PSV3 Soldering Iron Hack - Part 1
reverse engineering soldering iron stm32Intro #
There are some good and inexpensive soldering irons available nowadays. Thanks to USB power supplies with Quick Charge 2.0/3.0 or Power Delivery support you basically only need a microcontroller for temperature control, a FET switching the heating element, a way to measure the soldering tip's temperature and a way to communicate with the USB supply.
The cheapest ones[1] with a reasonable shipping time to Germany can be had for around 20€ (incl. taxes) on Aliexpress. Inspired by a Hackaday post about an iron containing "an STC8H3K62S2, [and] an 8051-based MCU running at a blistering 11 MHz" I sought to buy a similar looking device that was advertised like this:
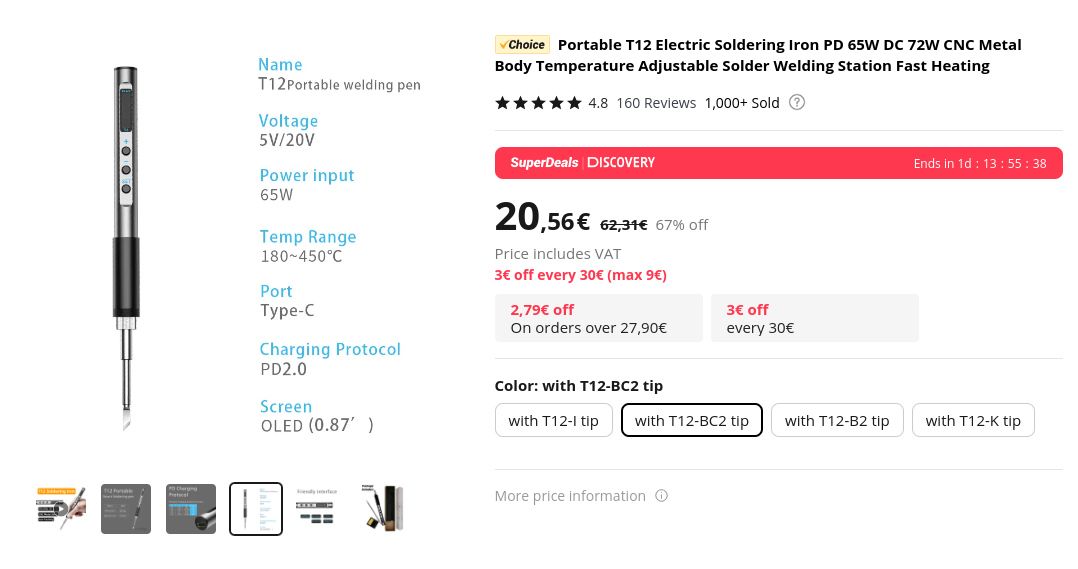
Thanks to a sale coupon the total price including free shipping came down to 18.46€. Never mind that the article's description is a bit weird considering the two different shown wattages neither of which are achievable with the supplied soldering tip (T12-B2) — it's an 8 Ohm tip so with 20V supply its maximum is actually 50W. Also I think by DC 72W they might mean when supplied through a DC barrel jack with more than 20V which other models have but this one doesn't.
TLDR: The hardware turned out to be different than expected from the Hackaday post (no 8051 but an STM32 clone) but after a bit of reverse engineering the PCB layout and parts of the original firmware I came up with a well working replacement firmware which performs quite similar to my Miniware TS80P with IronOS soldering-wise — The "secret" is that thanks to the power of Open Source I could adapt some of IronOS' temperature measurement and controller code with settings from the Pinecil which uses similar TS100 soldering tips.
My replacement firmware is available at: https://github.com/spezifisch/T12PenSolder (GPLv3 license). Read on to see how you can flash it and, in the next post how this soldering iron works.
Flashing #
Okay, you have this soldering iron and want to use this firmware?
The simplest way is to download a release build from my repository and flash it using an STLink adapter (the cheapest kind with a colourful aluminium case will suffice).
Opening the case #
To open the soldering iron you need to unscrew the tip and remove 2 Torx screws: one in the back holding the rear cap and one in the front under the silicone grip holding the front cap. Remove both caps.
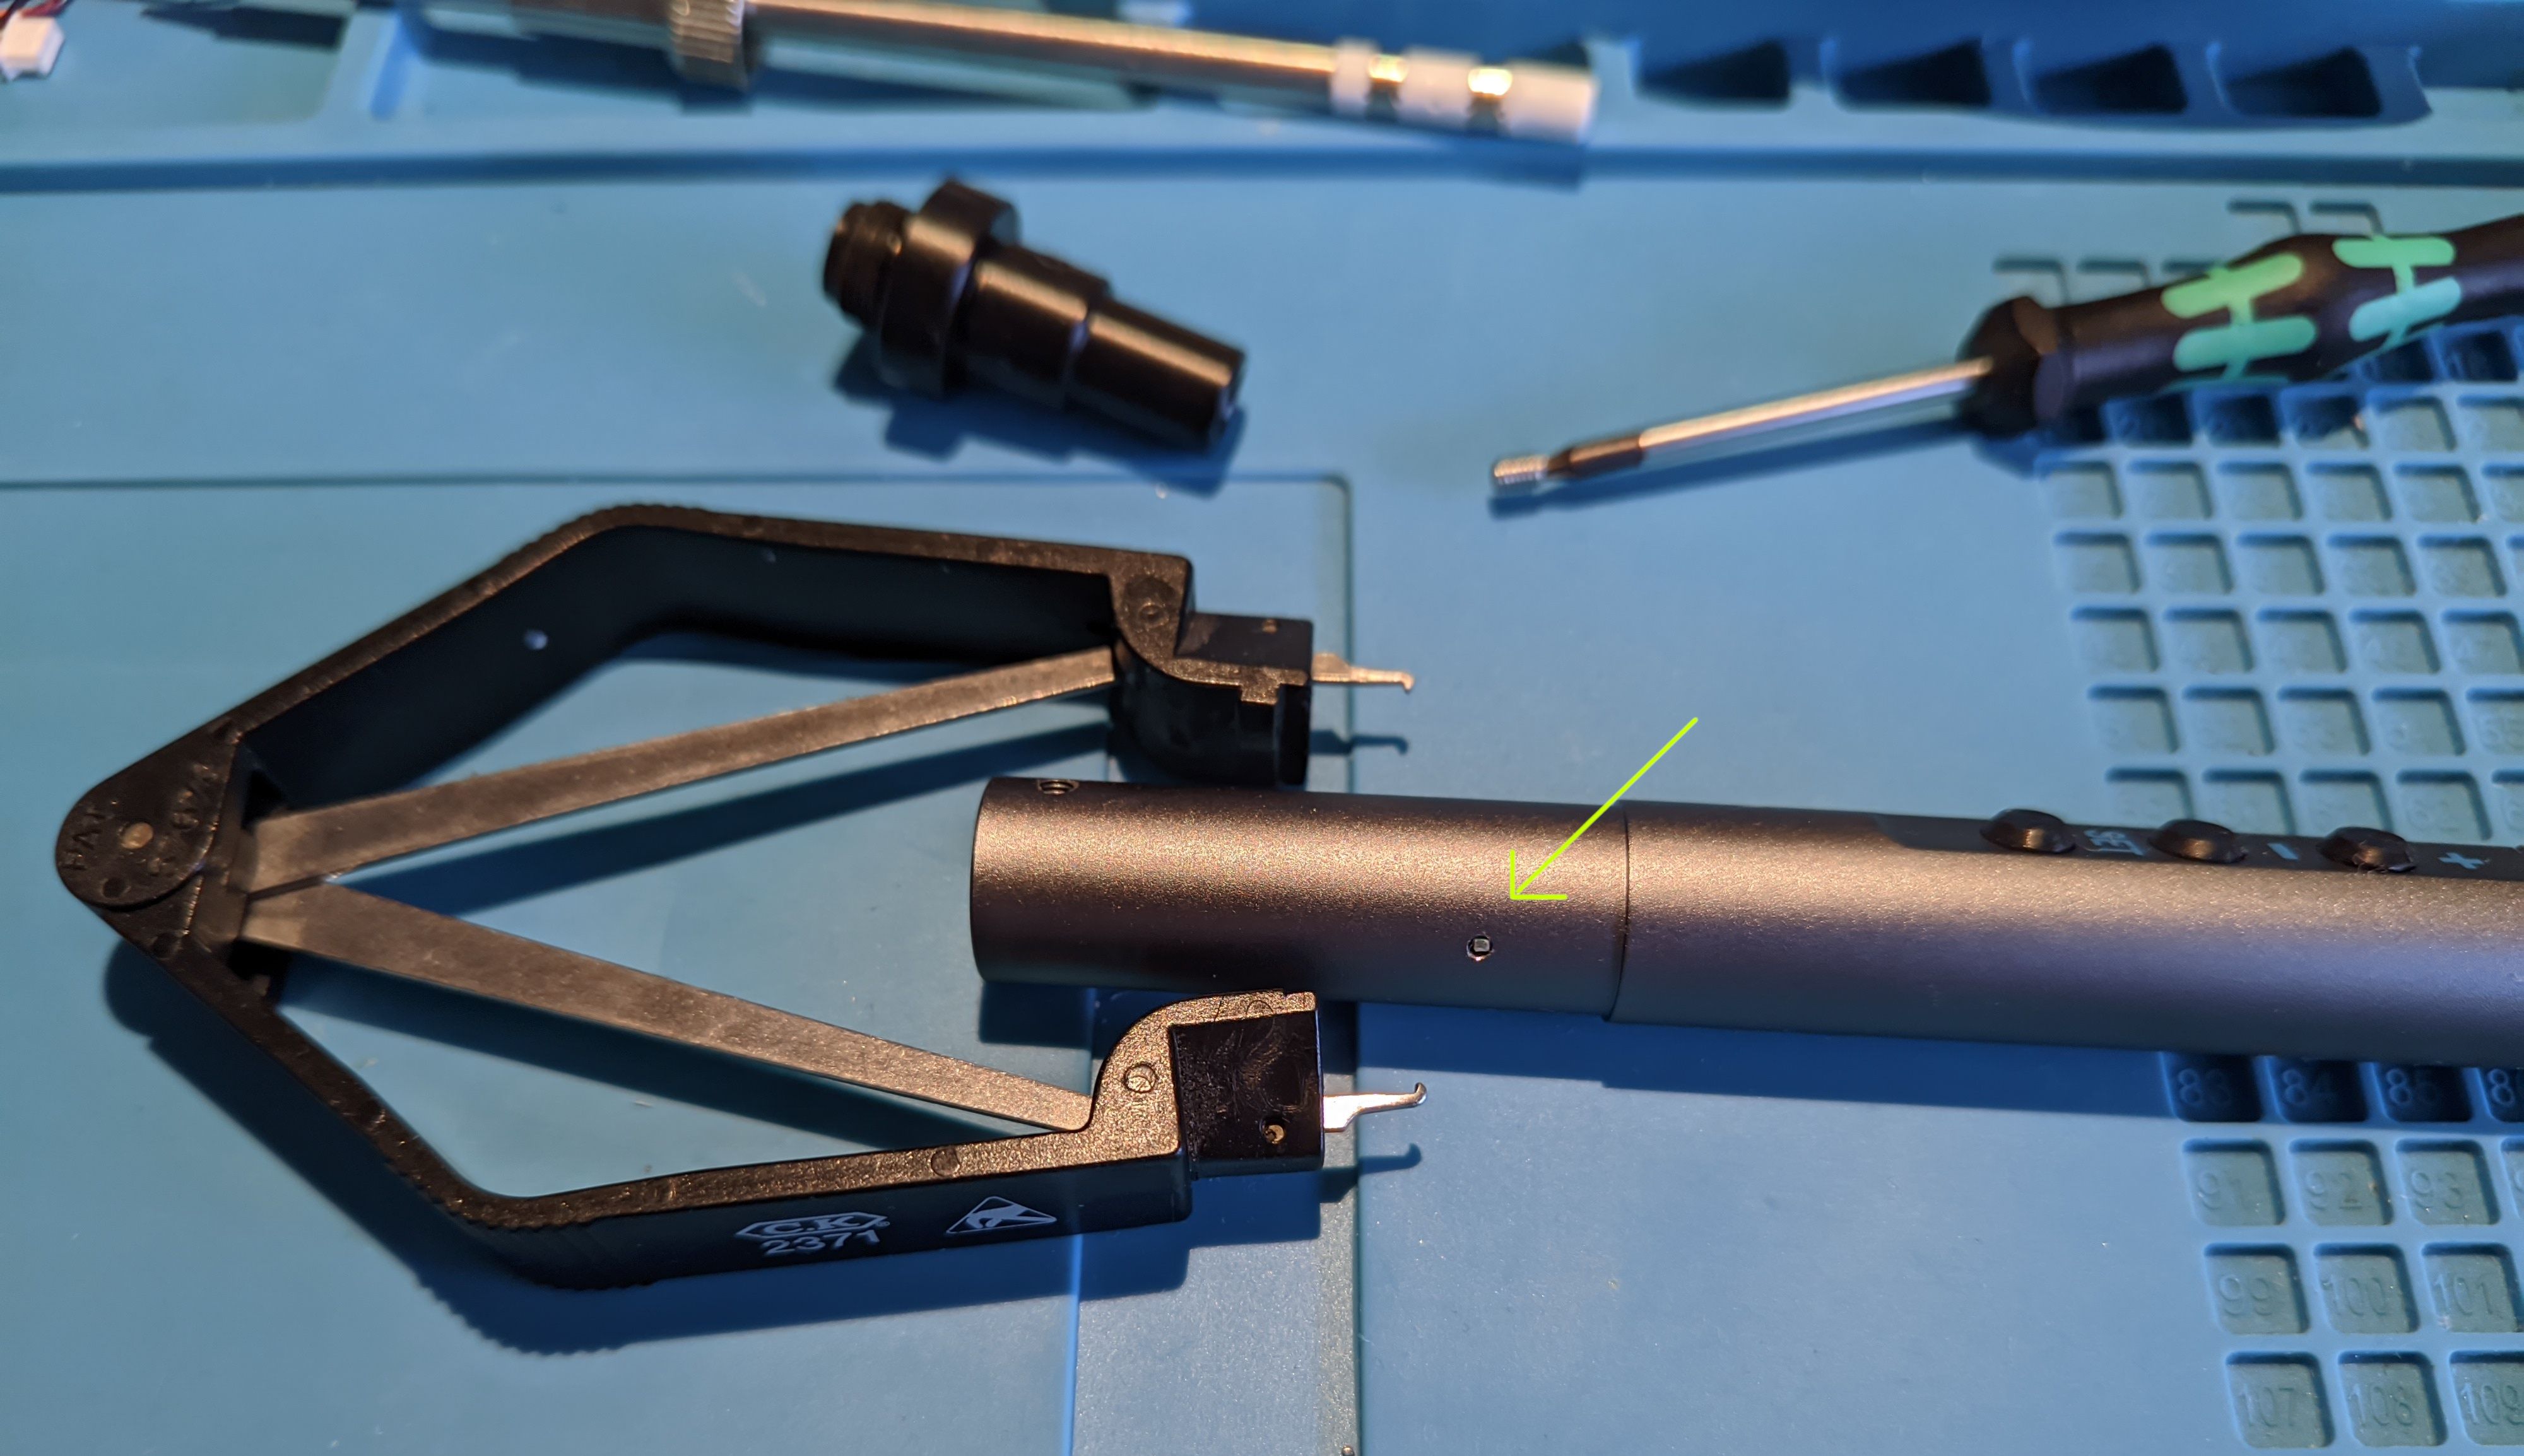
To get the PCB out you need to press two pins on opposing sides down at the same time and pull the USB-C side of the PCB out of the case. I found it easier to push the two pins down using the shown IC extractor tool:
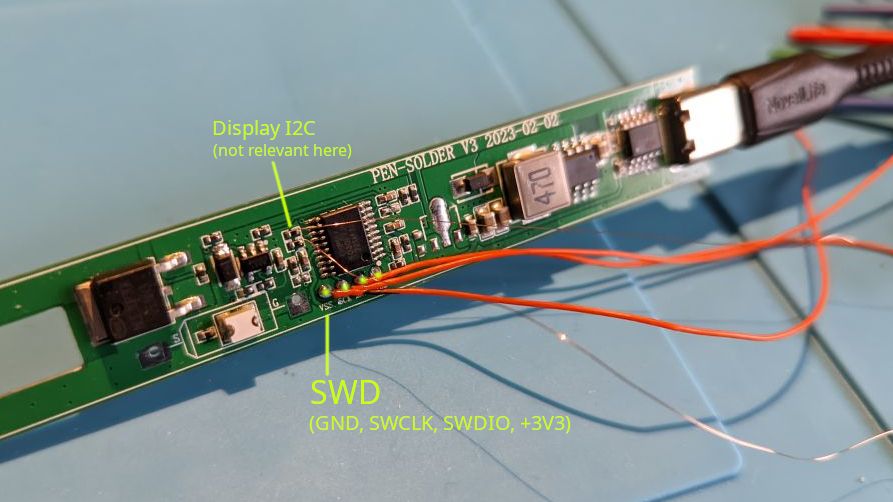
Connecting SWD #
Once you're in you need to connect some cables to the test pads labeled on the board: VSS, CLK, DAT. These correspond to GND, SWCLK, and SWDIO on your STLink adapter, respectively. Do not connect VDD (the 4th test pad). It's cleaner to supply the board in a more stable manner using an USB-C supply instead.
Once that's hooked up you should make a backup of the stock firmware with:
st-flash --hot-plug read t12-f0.bin 0x8000000 32768The program st-flash is available in the stlink-tools Debian package or more generally on Github. The flag --hot-plug is needed here because the reset pin isn't connected to your adapter.
Then flash the custom firmware with:
st-flash --hot-plug write pensolderv3_v1.0.bin 0x8000000Alternatively you can build the firmware yourself by cloning my repository, opening that directory with VSCode with PlatformIO installed, and just pressing Upload.
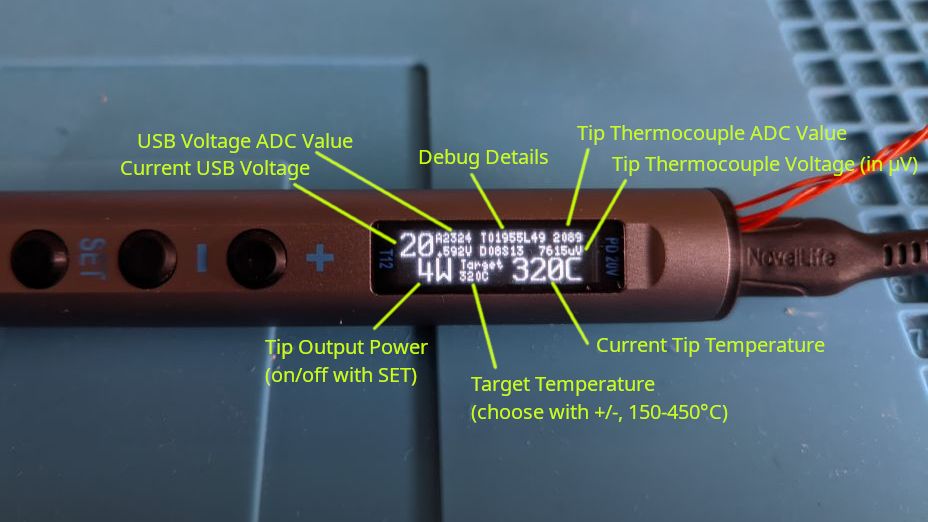
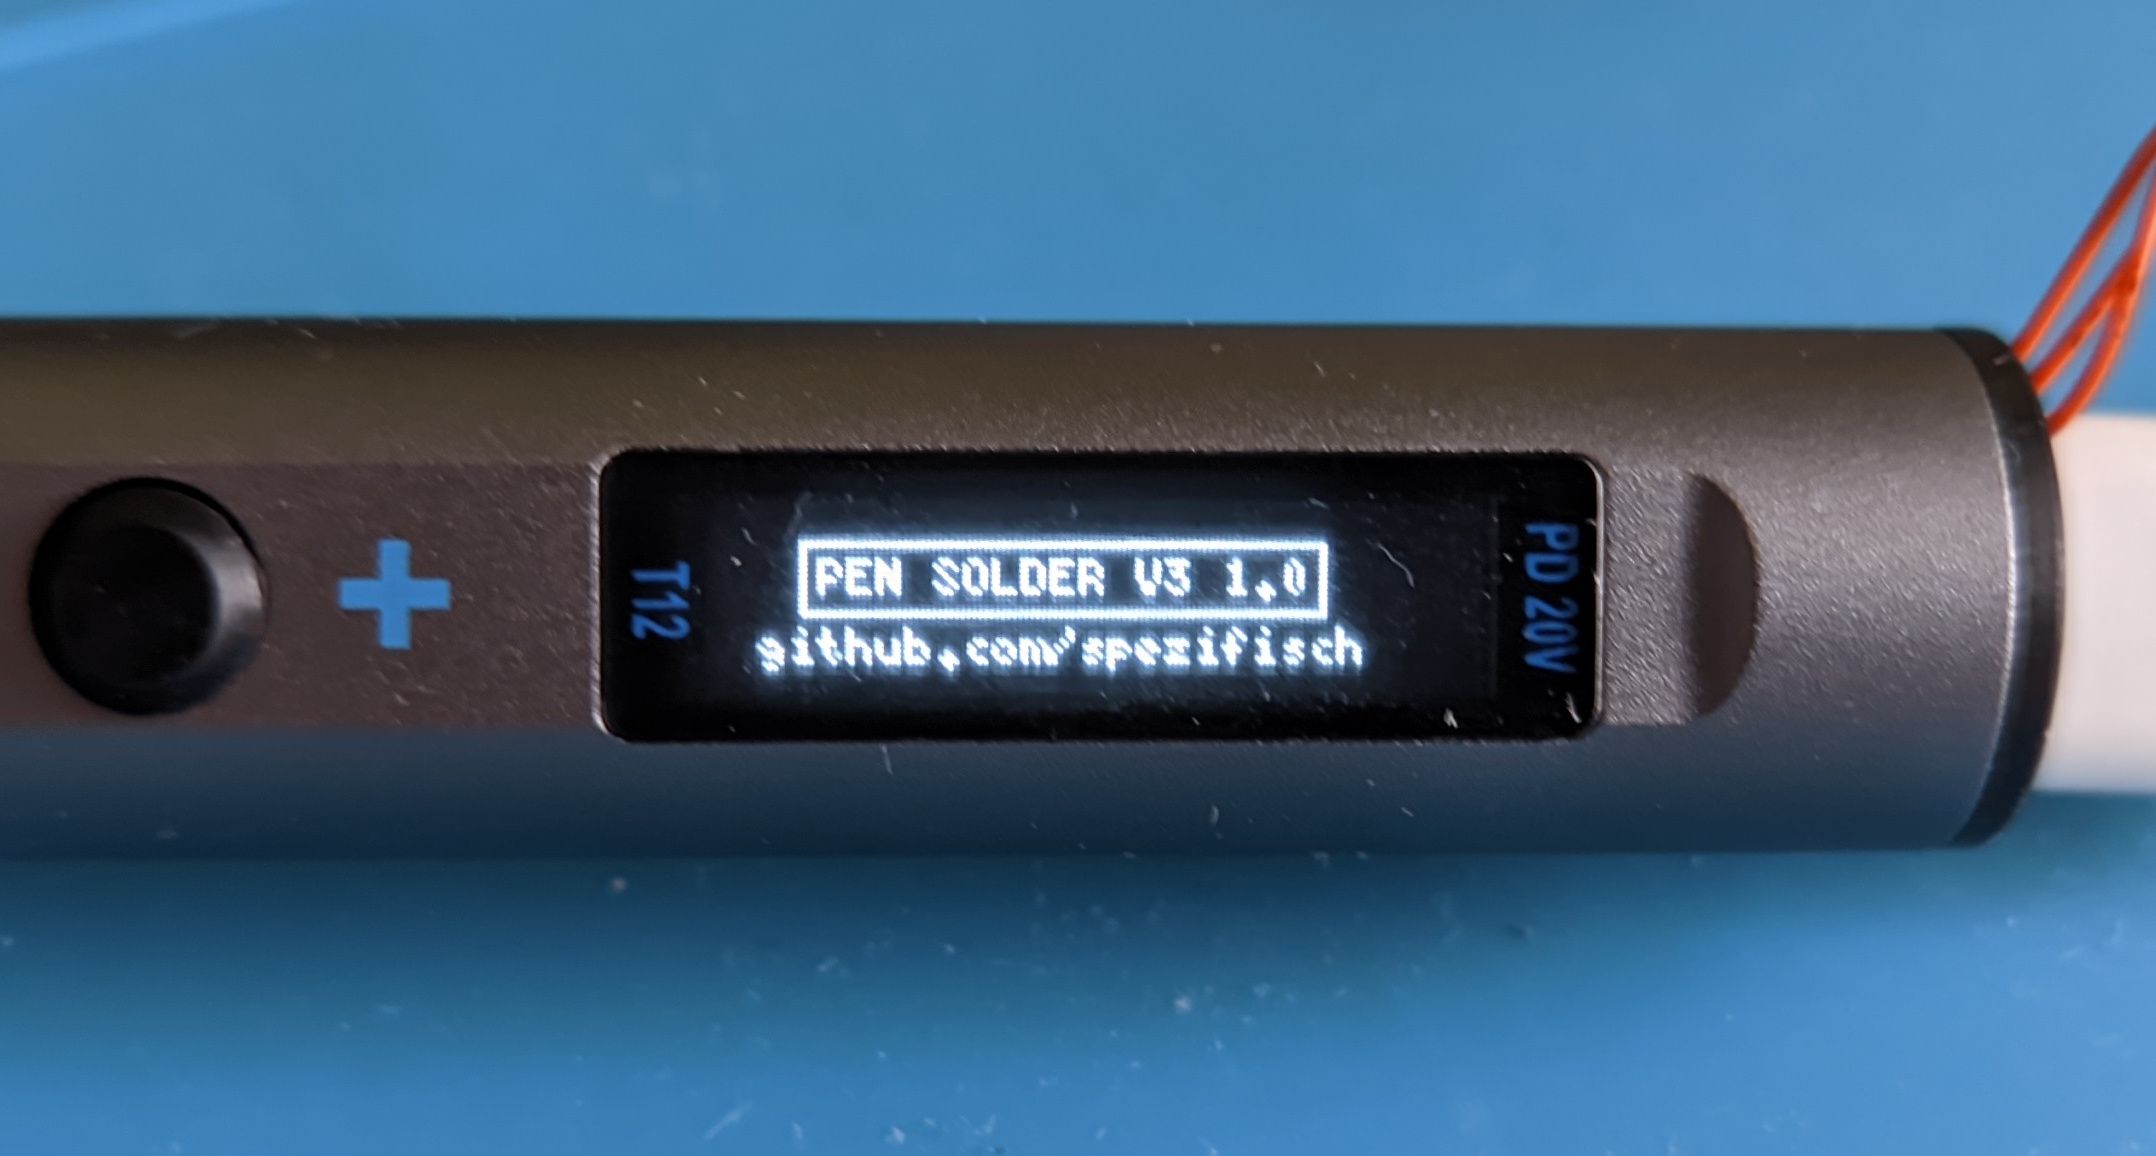
Finally power cycle the iron and this screen should greet you if all went well:
Outro #
That's all for this post. In the next part I will write a bit more about hardware details and the stock firmware. In the meantime have a look at my reverse engineered schematic and its annotated PCB layout:

Footnotes #
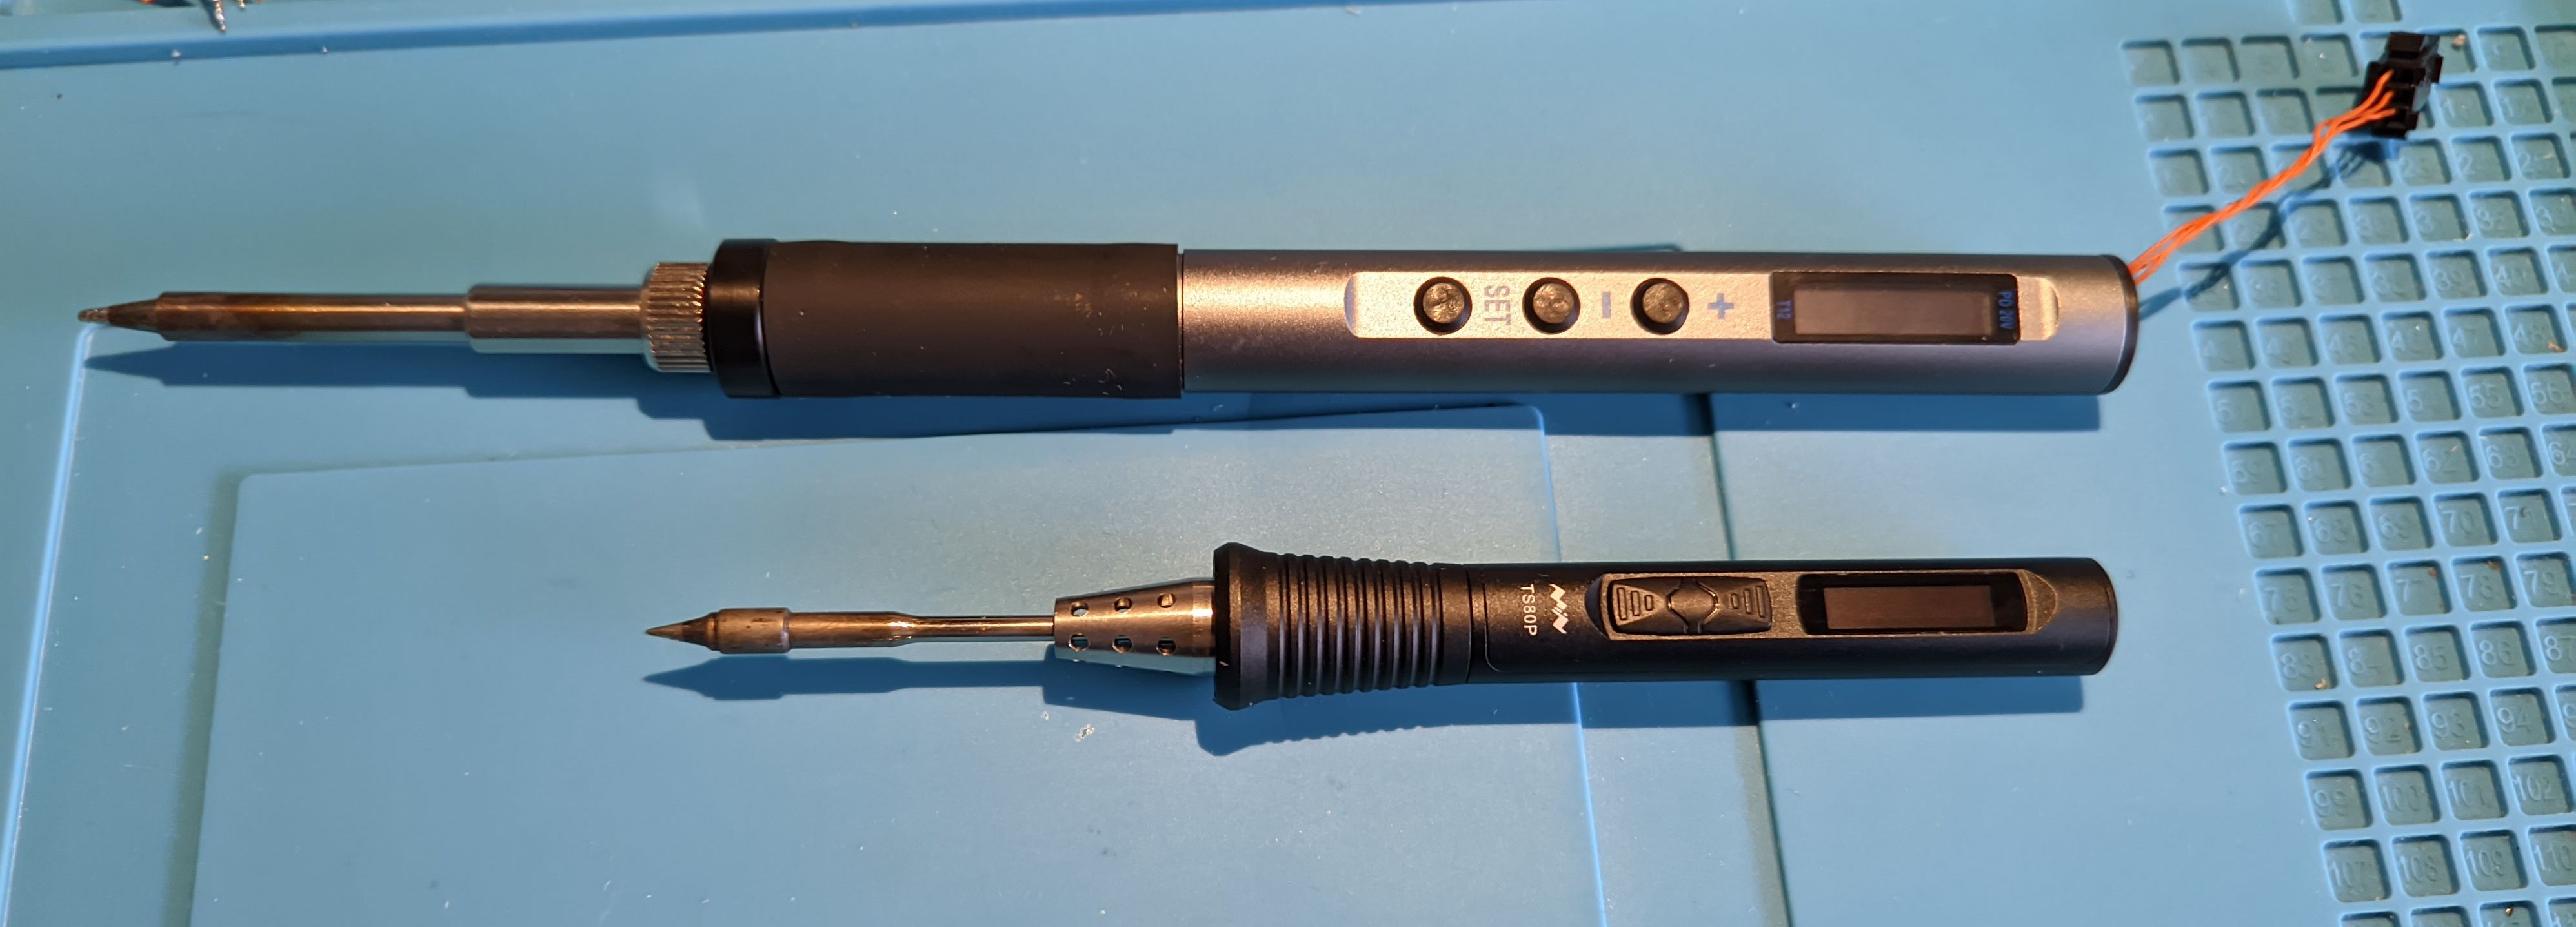
Quick aside: Of course I can't write this without a short mention of the Pine64 Pinecil. Its price is around 3x higher (40-60€, see below) but still inexpensive compared to something like the Ersa SMD soldering stations I'm used to. The Pinecil V2 is listed for $26 but including shipping to Germany it's $38 with "custom tax and VAT not included".
So with an import VAT of 19% it's around 41€ and you need to drive to your customs office or pay Deutsche Post service fees if they handle the import taxes. So let's say it comes out to around 45€ and possibly a road trip to customs. Another option would be a local German reseller where I saw it for 58€ incl. shipping.
Another aside: I'm very happy with the Miniware TS80P (the other soldering iron you see in the photo). It's handy, light, and awesome for SMD work but its tips are pretty expensive (~20€) compared to the cheapest T12 tips (~4€). ↩︎